 Zinn® Cache
Install Zinn® Cache on a WordPress site
How to install and activate Zinn® Cache, where its settings live, and how to confirm the page cache is working.
Check where the site is hosted
WordPress sites on our own servers already have Zinn® Cache installed and active — go straight to checking that caching works. For a site hosted anywhere else, install it as below: it works on any web server.
Download the plugin
Download the latest Zinn® Cache zip from this site. Keep the file zipped.
Upload and activate it
In WordPress, open Plugins, choose Add Plugin, then Upload Plugin. Choose the zip, install it, and press Activate.
Open the settings
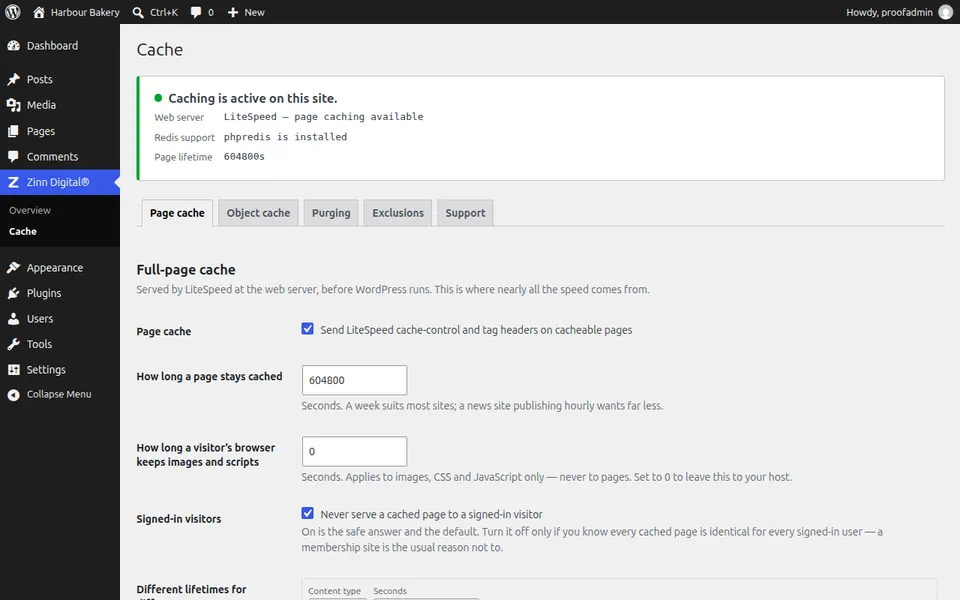
A Zinn Digital® menu appears in the WordPress admin. Open it and choose Cache. The panel at the top shows which page cache is in use, whether the Redis object cache is storing data, and the page lifetime.
Confirm caching is active
The panel should say the page cache is active. On LiteSpeed it uses the server's cache; on any other server it installs its own file cache the first time you open the settings.
Next guide: Install Zinn® Cache Pro
Included free with Zinn Digital® hosting
Get Zinn® Cache free on Zinn Digital® hosting
Every WordPress site on our own servers comes with Zinn® Cache installed and connected: the page cache is on, the Redis object cache is managed for you, and plugin updates arrive on their own. Zinn® Cache Pro is not included; add it to any site when you want it.